First steps in contractSILO
After registering your account and logging in for the first time, you should adjust your settings. Then, you can invite employees and upload your first contract.
- Check your account currency
- Password security
- Configure Reminders
- Configure Contract-Types (Only Essentials and Professional Version)
- Create Contract-Teams (Only Professional Version)
- Invite new users (Only in Essentials and Professional Version)
- Your first contract
Check your account currency
Revenues and expenses from contracts can be recorded in any currency. To facilitate financial analysis, all values are converted into the account currency. If EURO is not used, a different currency can be selected for the account. Revenues and expenses will then be shown in the chosen currency both in the contract list and on the dashboard.
To change the account currency, go to the “Account settings” view (on the Menu) and click the “Settings” tab, where the account currency will be displayed and can be selected from the list.
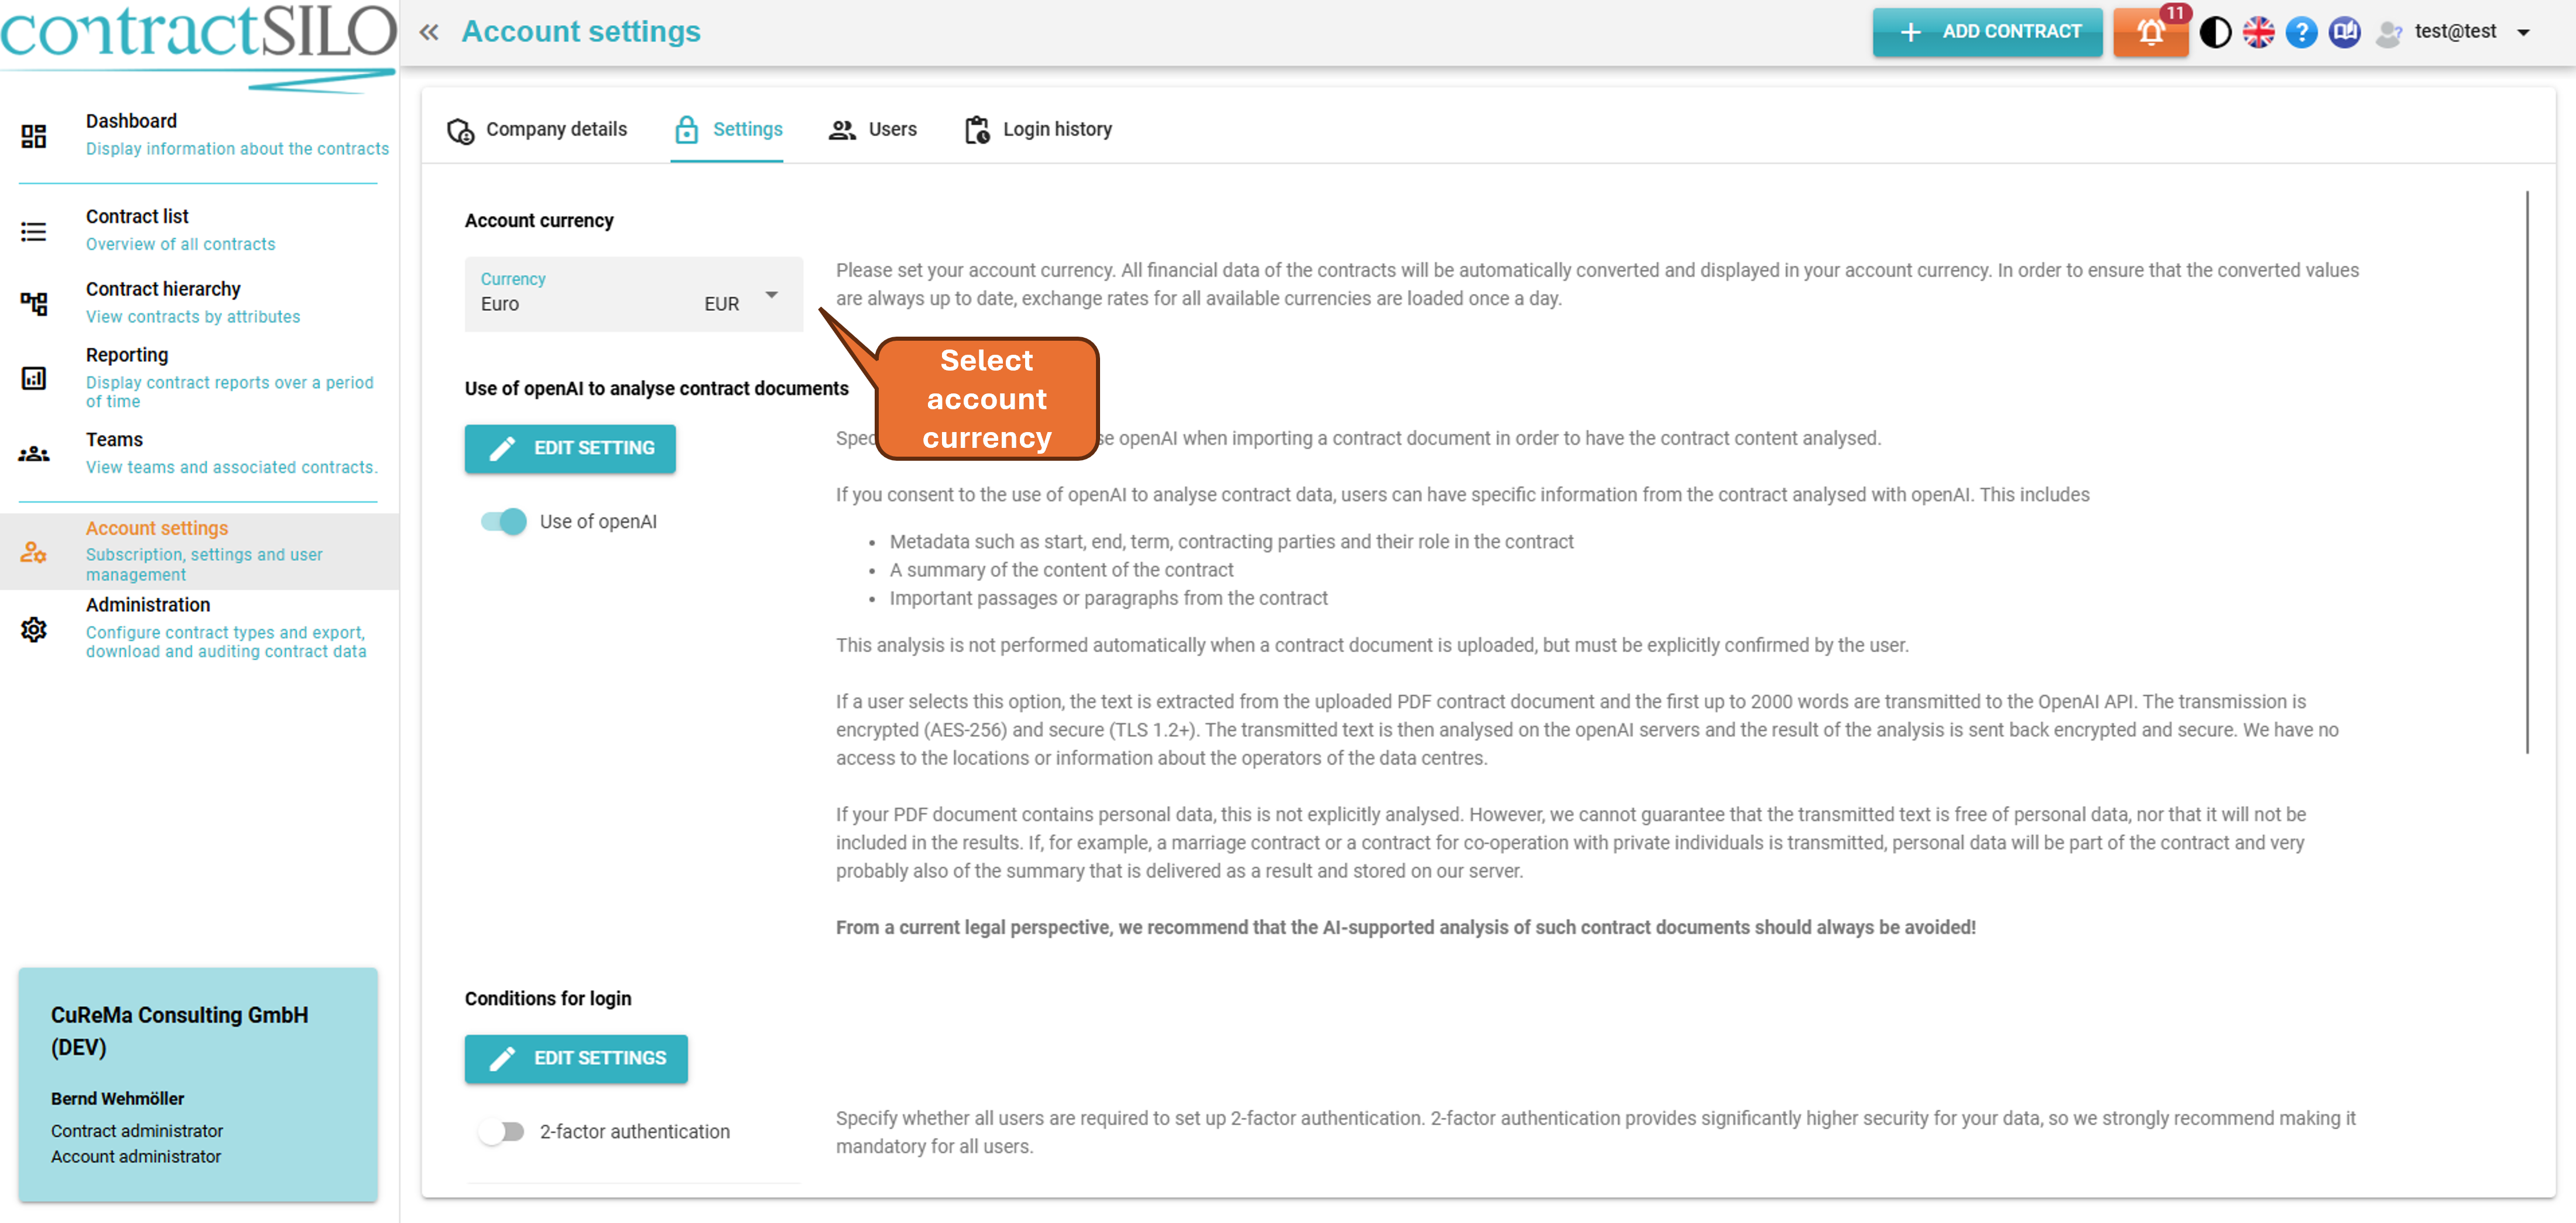
To set the account currency, you need to be logged in as the account administrator.
Password security
To change the password settings, go to the Account Settings view and click on the “Settings” tab. In the lower section, you can edit the password security settings. Click on the button labelled Change Settings to make the necessary changes.
You can specify the requirements of a password set up in terms of minimum length, the number of letters, numbers, and special characters, as well as the number of uppercase and lowercase letters. Users will be informed about the password rules when entering a new password.
To adjust the password security settings, you need to be logged in as the account administrator.
If two-factor authentication is enabled in the account settings, it is mandatory for all users to use two-factor authentication for login. This means that once users log in via their username and password, they will receive a code - either through an authentication app or via email - which they must enter as an additional step. The code will expire after a few minutes.
Two-factor authentication provides significantly higher security for your data. Therefore, we recommend making it mandatory for all users.
To enable or disable two-factor authentication, go to the Account Settings view and click on the Settings tab. In the middle section, you will find the current settings. To make changes, click on “EDIT SETTINGS”.
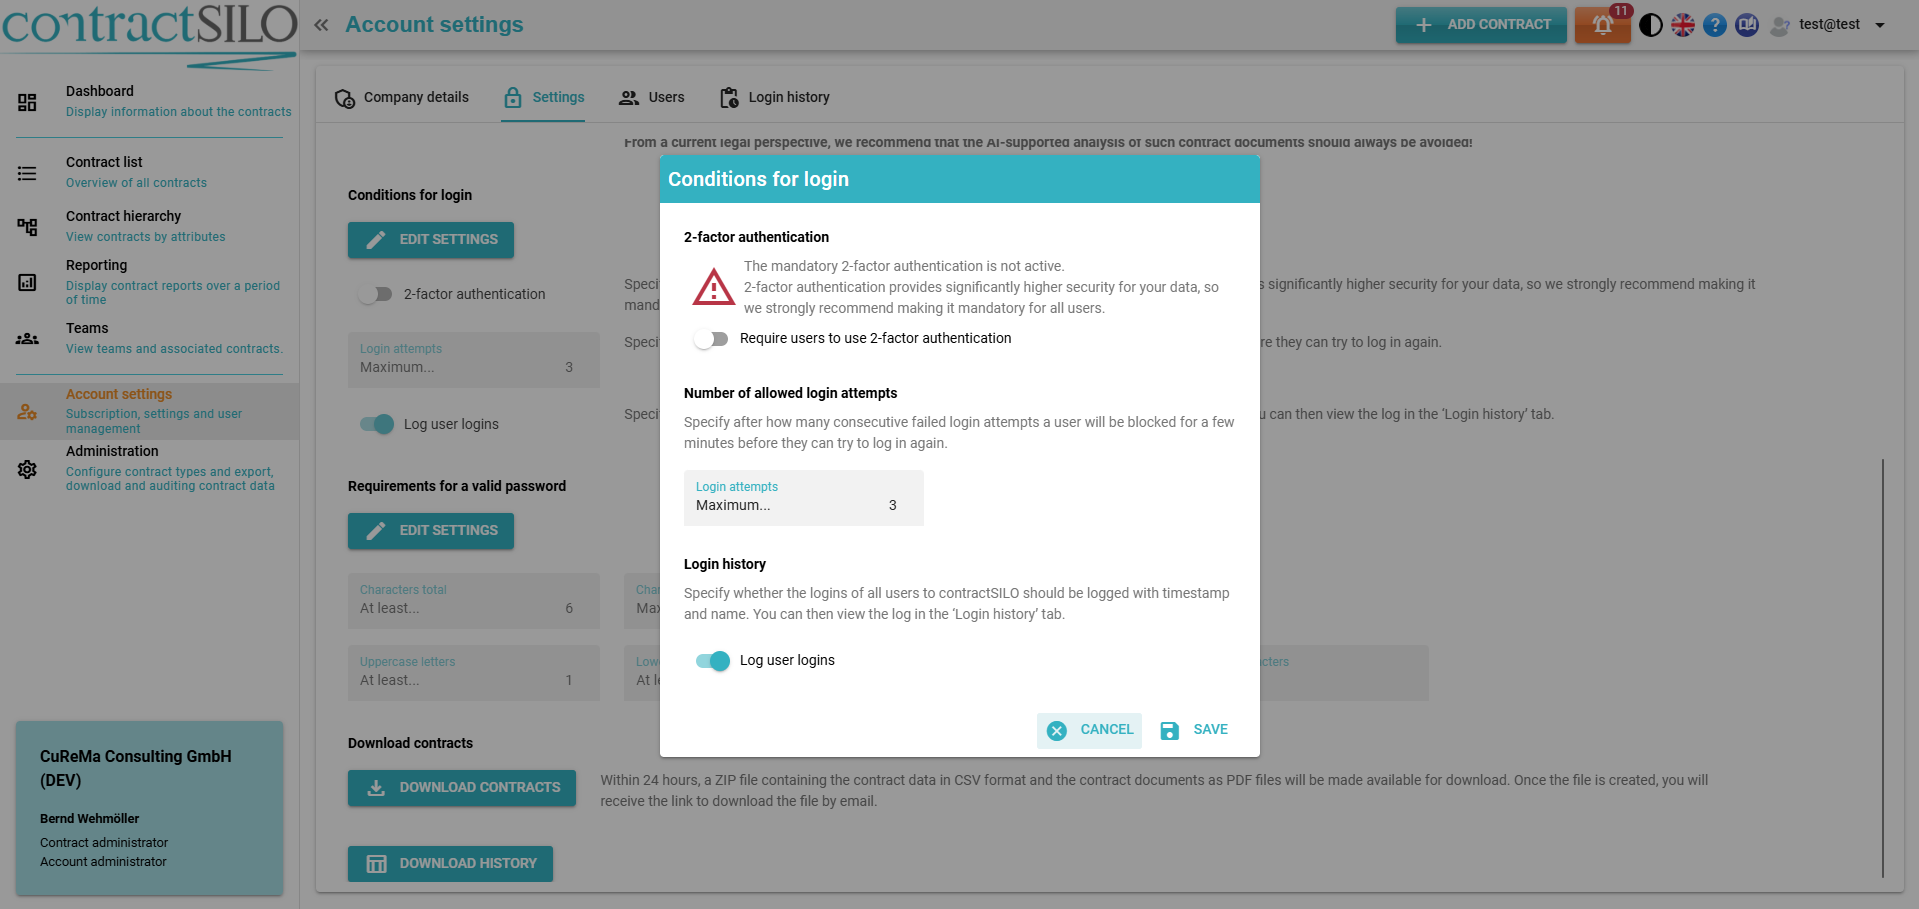
If two-factor authentication is enabled for your account, it becomes mandatory for all users. New users and users who have not previously activated two-factor authentication will receive the code via email during the login process. They can later choose to switch to using a mobile app for two-factor authentication if they prefer.
Configure Reminders
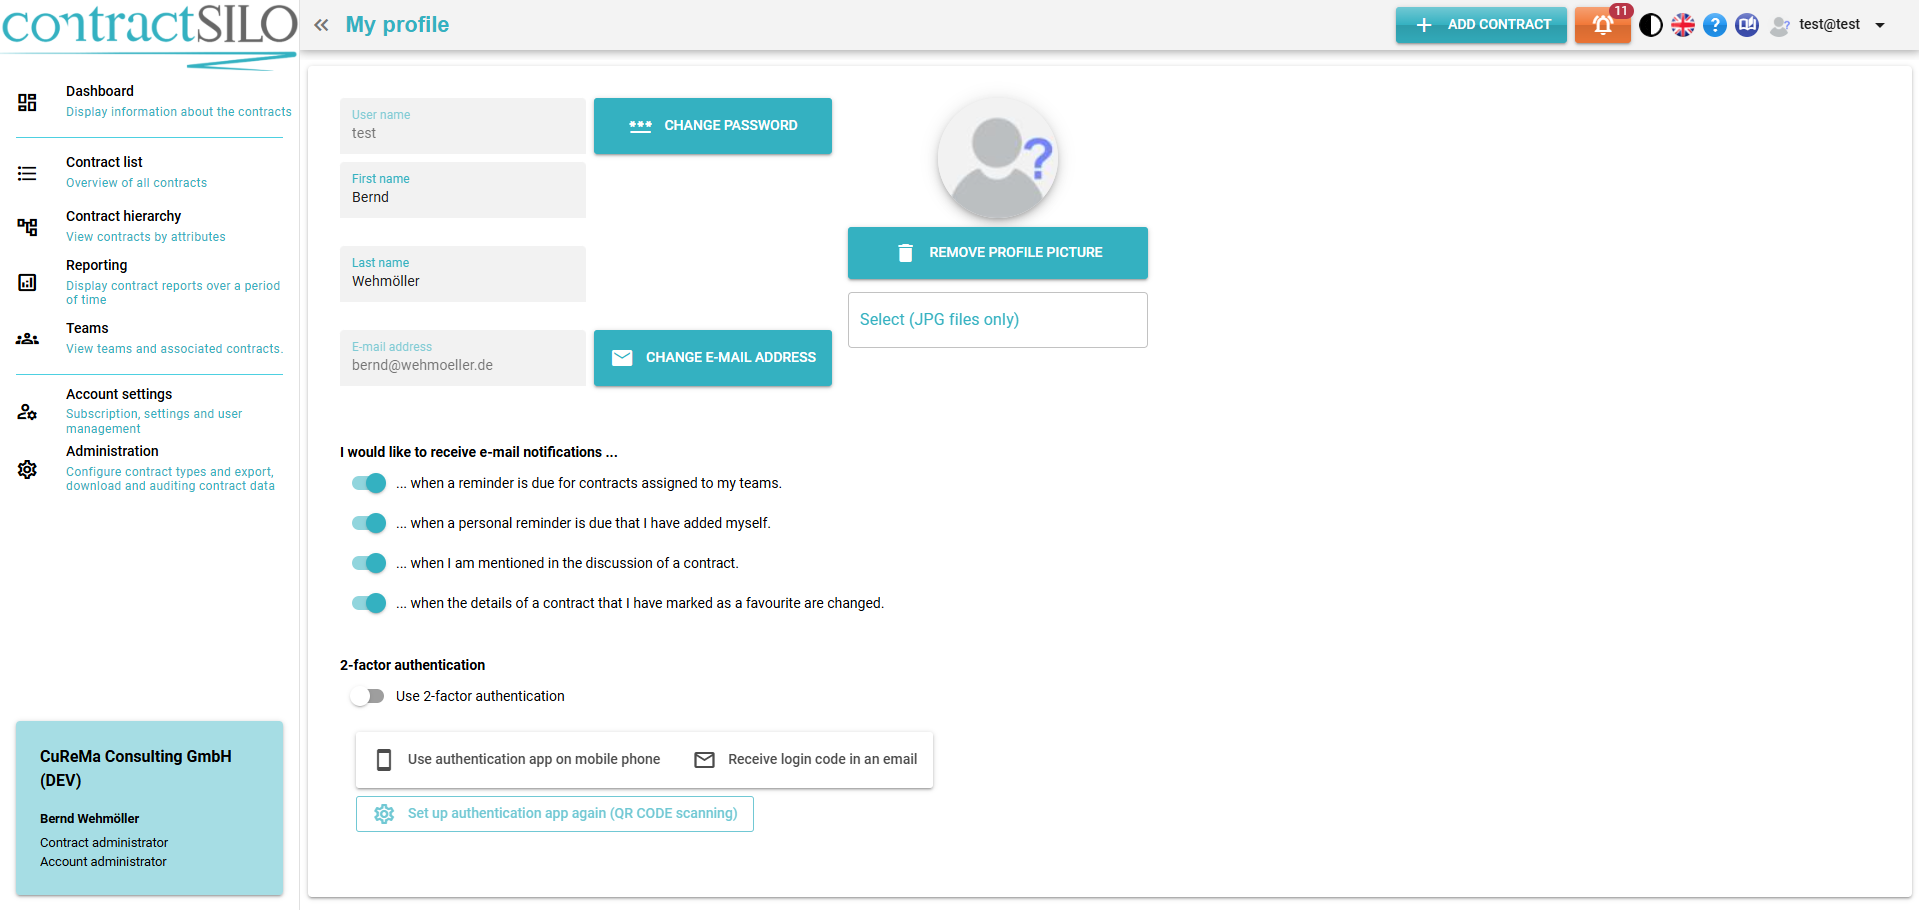
contractSILO can send you email reminders for expiring contracts. For more information about reminders, please go to the Contract Reminders. You can choose whether to receive email reminders and customize the types of reminders you want to receive.
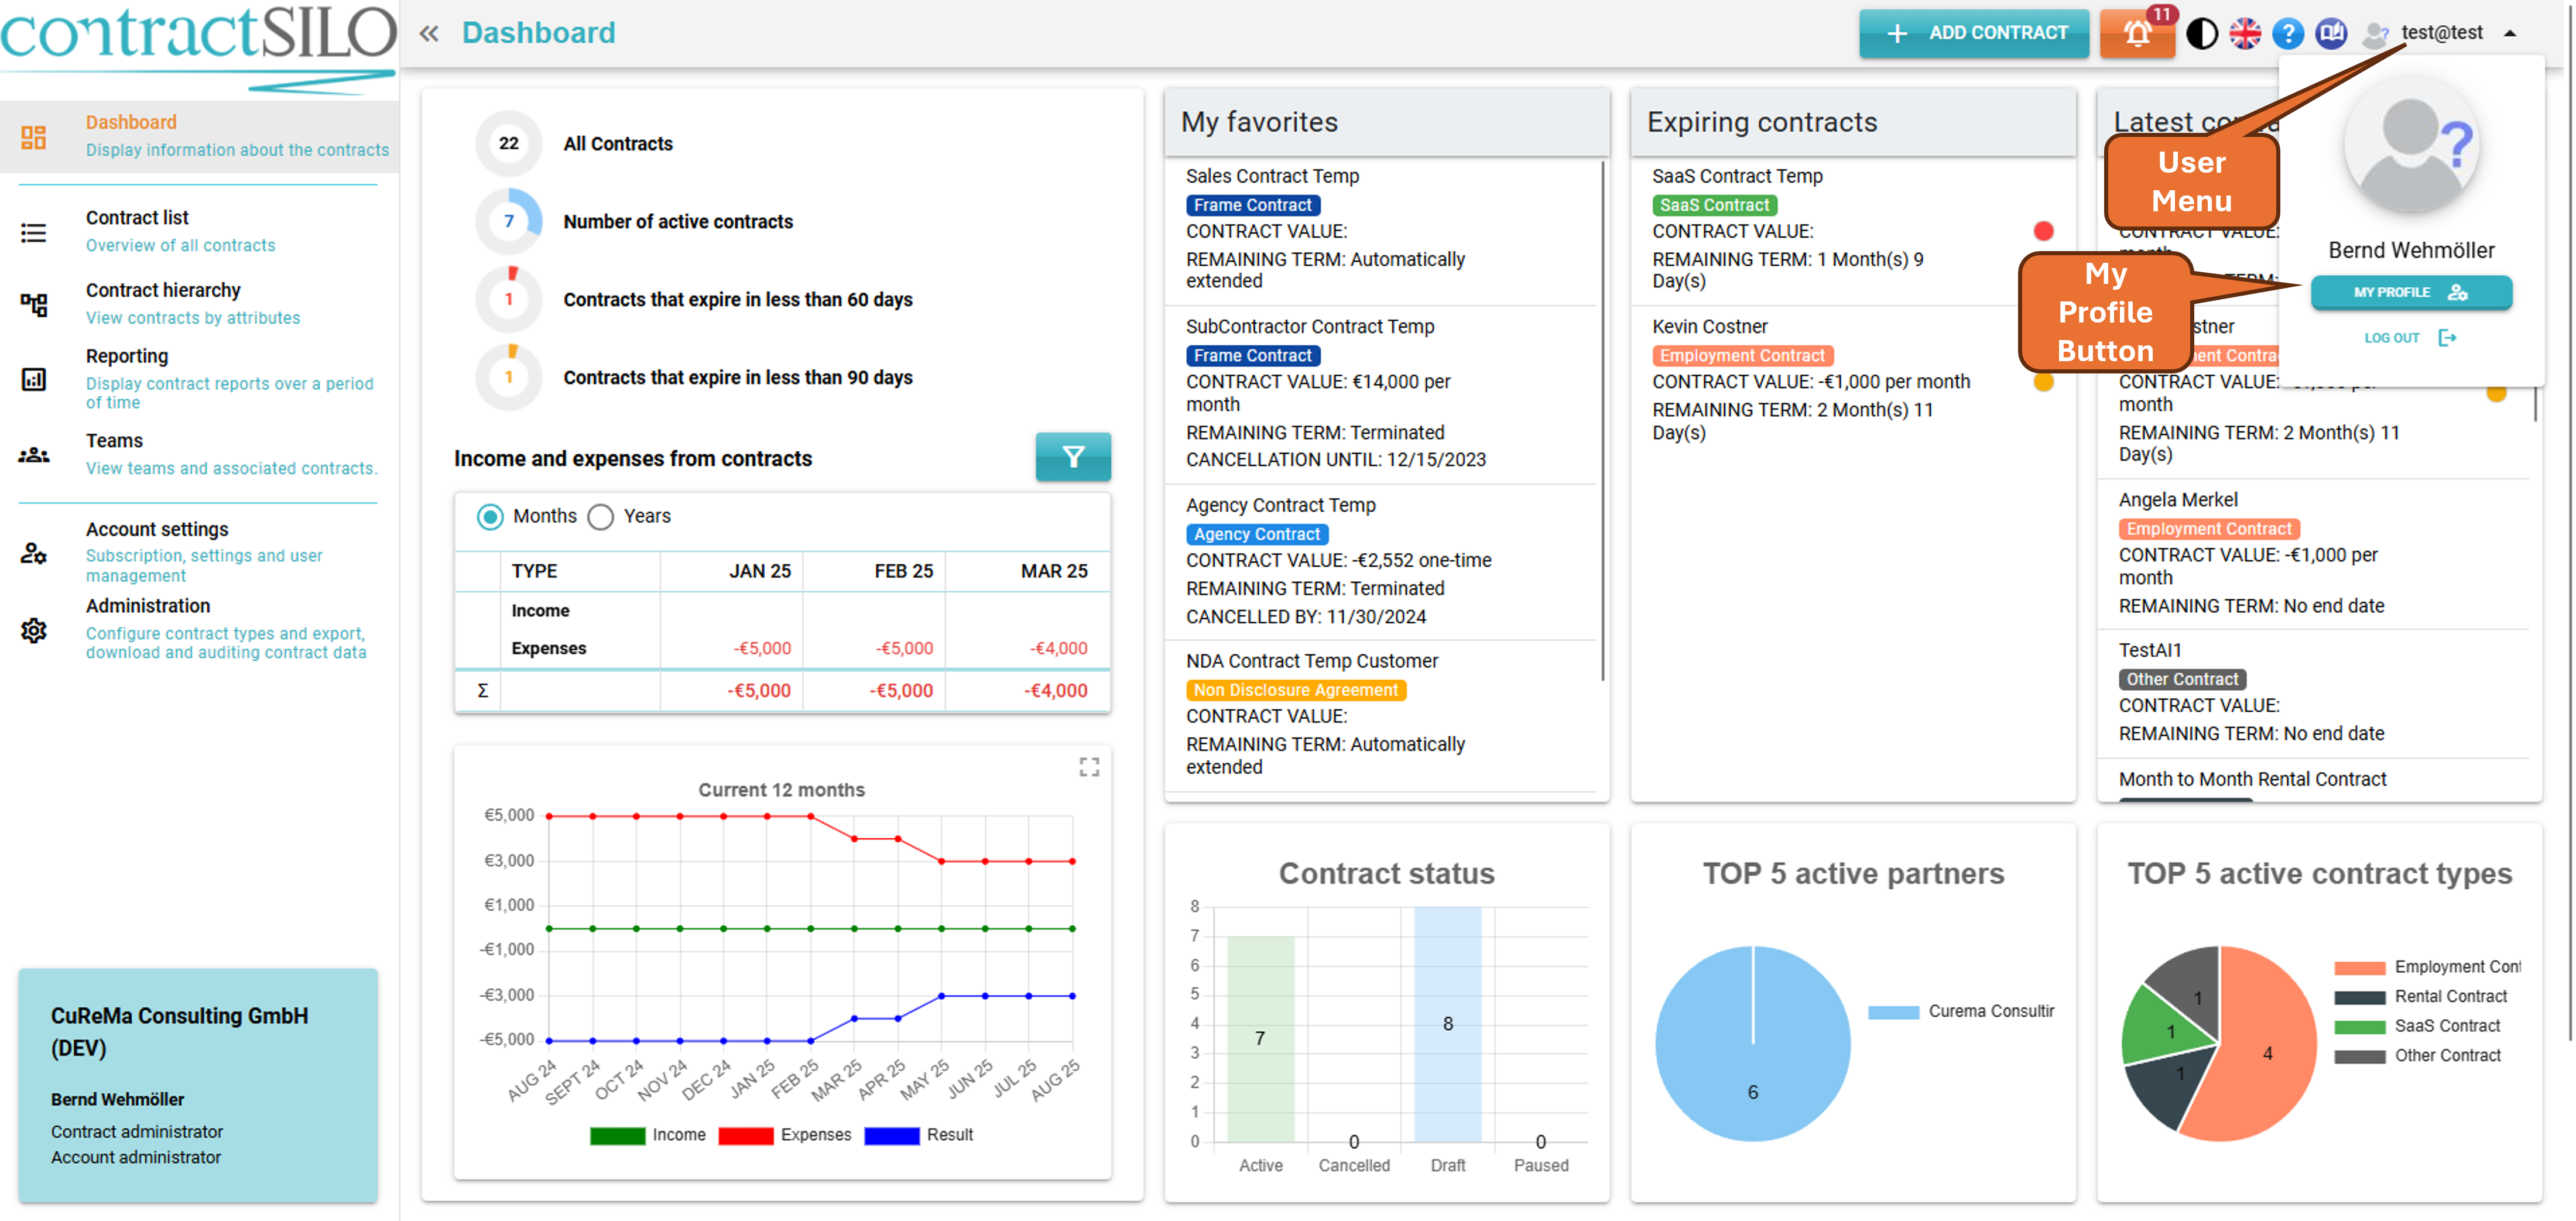
To specify which email reminders you would like to receive, go to the My Profile view. In the middle section, you will find two options that be turned On or Off according to your preferences.
Configure Contract-Types
Not available in the FREE version
Please visit the Contract Types page, where you can find the detail information about contract types and their management.
Create Contract-Teams
Contract teams are only available in the Professional version of contractSILO.
The visibility of contracts in contractSILO is managed through contract teams. You can find more information under the Visibility of Contracts title. Users can only see and edit contracts that are assigned to at least one of the teams they belong to.
For example, you may a team called “Backoffice” to which all contracts relevant to the team are visible. On the other hand, a team called “HR” may have access to all employment contracts but not lease agreements.
After your account is created, initially there will only be one team in contractSILO, called the "Administration Team" You will be the only member of this team until you add new employees to this team.
Members of the "Administration Team" are referred to as contract administrators. They are authorized to manage various aspects of the contract management system, such as:
- Create new teams.
- Assign or remove employees to/from a team.
- Delete or reactivate archived contracts.
- Assign contracts to any other teams.
Standard users can only assign contracts to the teams they are a member of.
You should assign at least one person in the company to be responsible of contract management. This person should then be added to the Administration Team.
For simple purposes, a team structure could look like this:
- Administration Team: Manages teams and contract assignments.
- Backoffice Team: Contracts regarding payments and revenue
- HR Team: Contracts related to employees.
- Management Team: Contracts relevant to the management team
- Project Team: Project contracts that need to be reviewed by project managers.
- Marketing Team: Contracts related to marketing and sales.
We recommend that you think about the team structure early on. Later, when you have more contracts in the system, it will be more complex and time-consuming to make changes to the team structure.
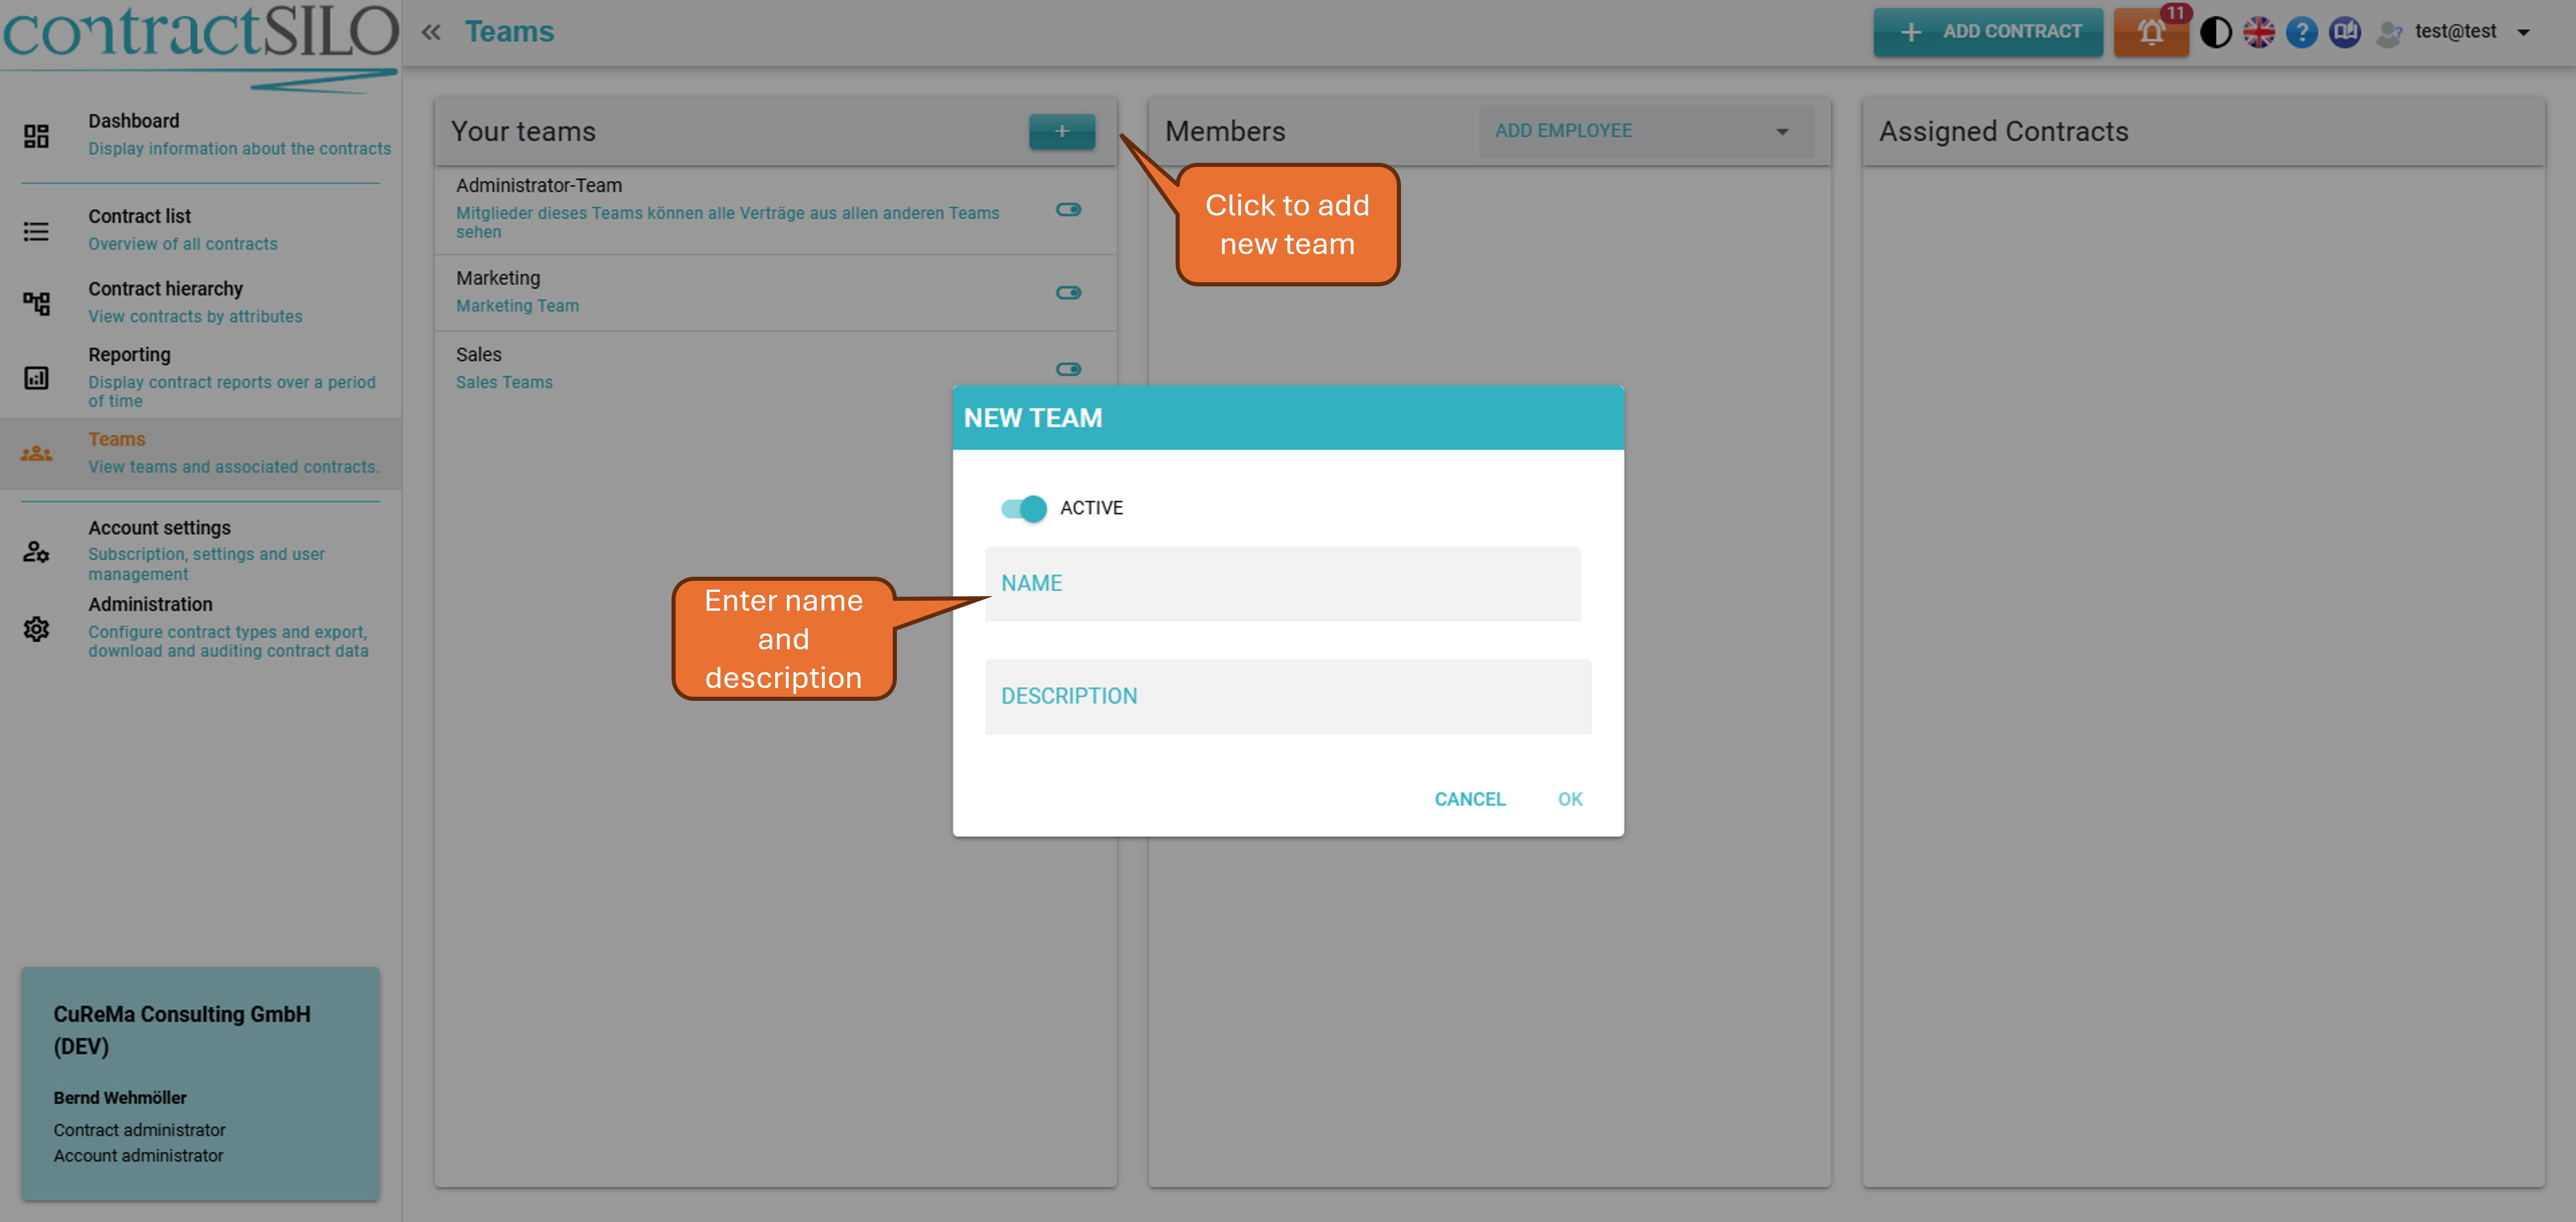
To create a new team, refer to the Teams view and select the Administration Team. Click on the “+” button on the team column, enter the name and the description for the new team in the pop-up. The ID will automatically be generated.
Invite new users
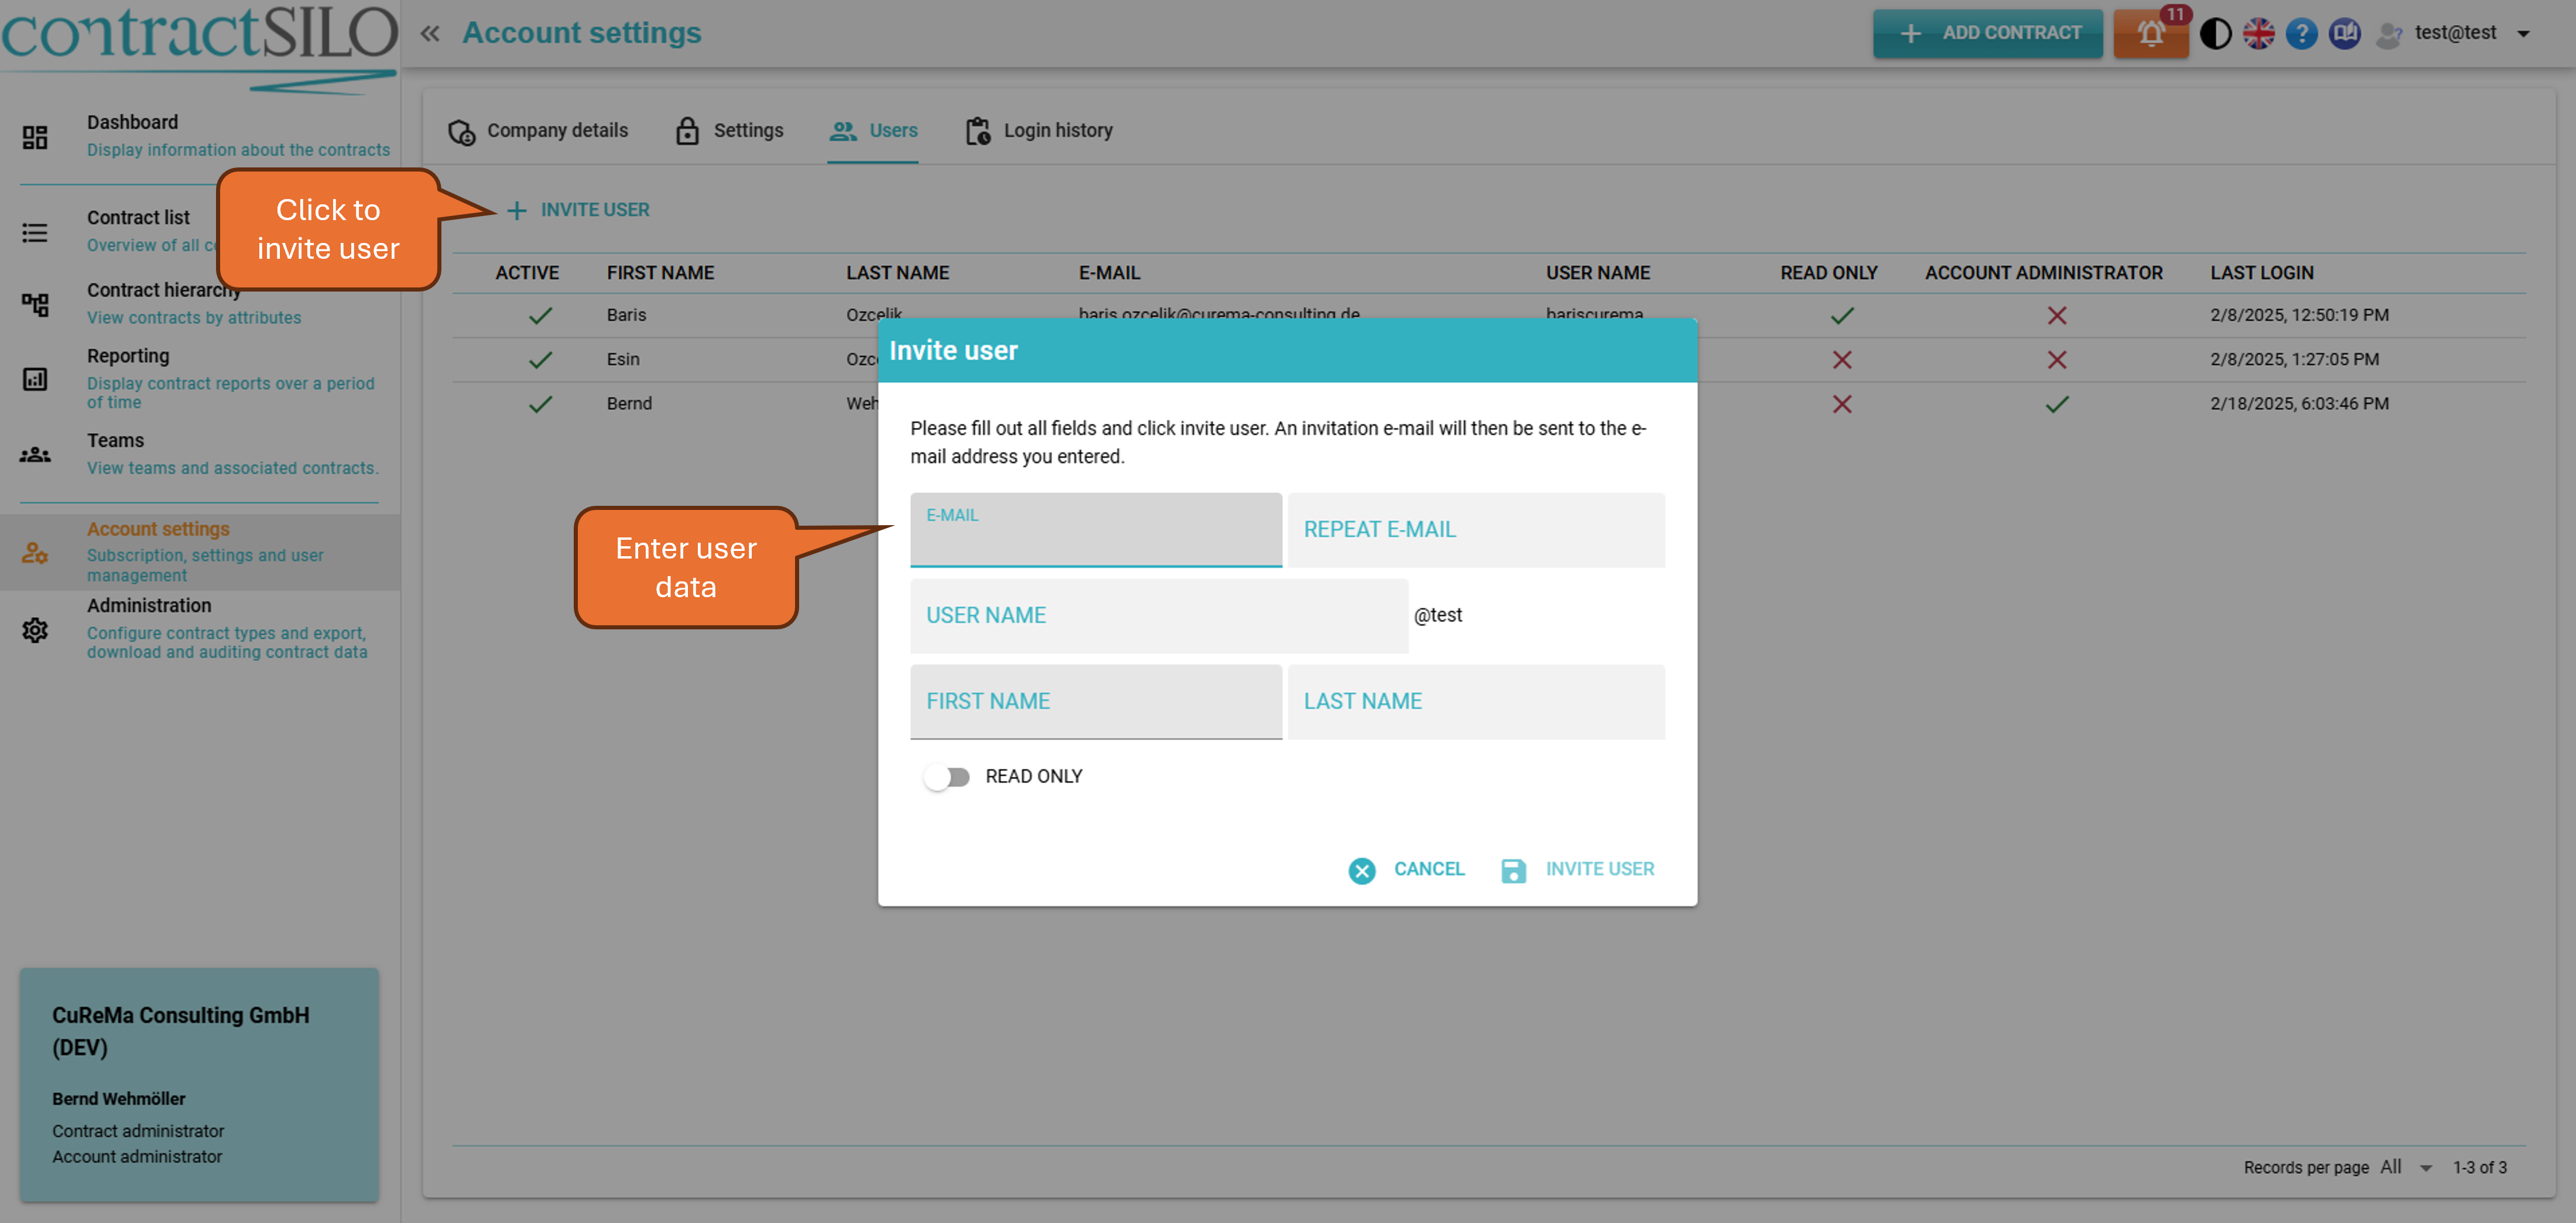
To invite employees, go to the Account settings view and refer to the Users tab. Click on the INVITE USER button and enter the details of the new user. Once you have inserted the information, the new user will receive an email invitation to join your contractSILO account.
Two notifications will appear at the bottom right:
- A confirmation that the new user has been invited.
- A prompt to assign the new user to a contract team.
Now, navigate to the Teams view to assign the new user to a team. Select the team to which you wish to add the user. On the second column next to Members, choose the new user from the list. The user will then be assigned to the relevant team.
If users are not assigned to any team, they will not be able to log in. Therefore, it is important to always select a team for new users during the invitation process.
In the FREE version, this feature is NOT available because you cannot add additional users.
Your first contract
Once everything is set up to add the first contract, click on the Add Contract button in the title bar. The Contract List view will be displayed, and the pop-up window for a new contract will open.
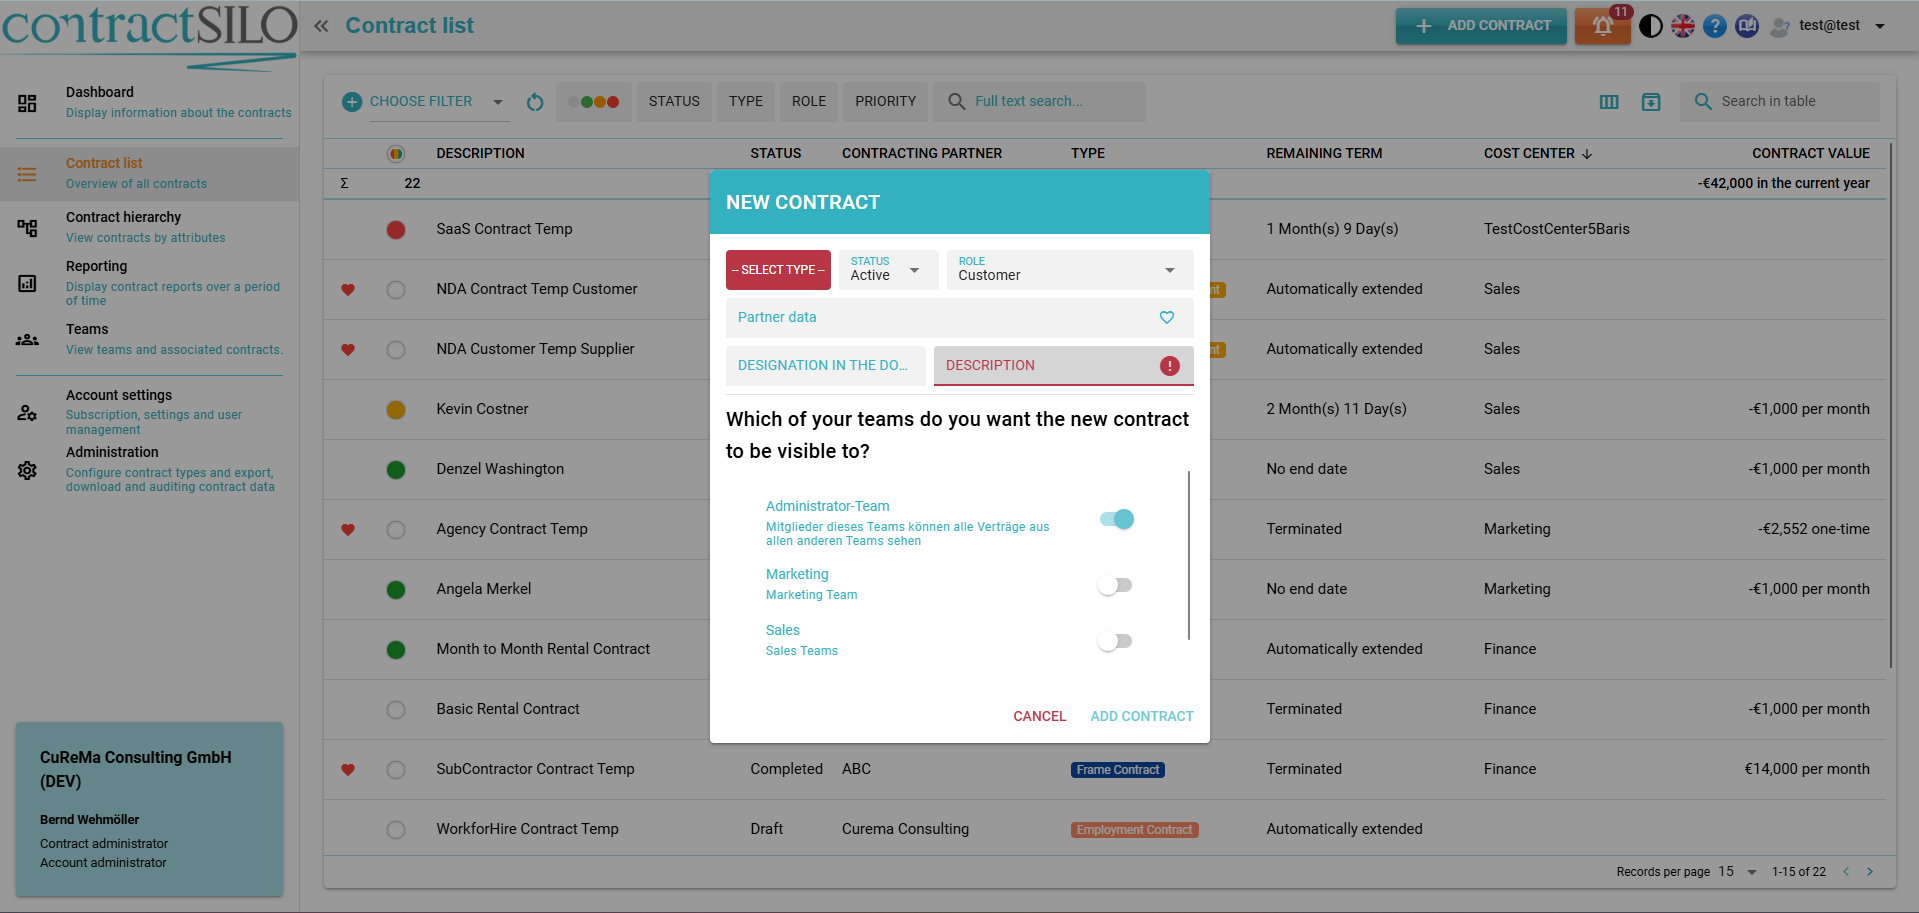
Select the contract type from the list and insert a description for the contract. The description should define the contract and be chosen in a way that conveys the purpose of the contract. To enter the official contract title, you can use the "Document Title" field.
Additionally, you can adjust/complete fields below as necessary:
- Status: If the contract is already signed and valid, set the status to "Active"; otherwise, set it to "Draft."
- Role: If you will be the payer as per the contract, select "Supplier" If you will be the payee, select "Customer" If the contract is not related to any payments, select "No Role"
- Contract Partner: Here you can enter the name of the contract partner, typically the name of a company.
Finally, select the contract team(s) to which the contract should be visible.
The Administration Team is automatically selected and cannot be deselected. Contract administrators are authorized to always see all contracts. This is necessary as in the event of there being an issue regarding a contract, as it can only be resolved by a contract administrator e.g., if a contract is assigned to the wrong team.
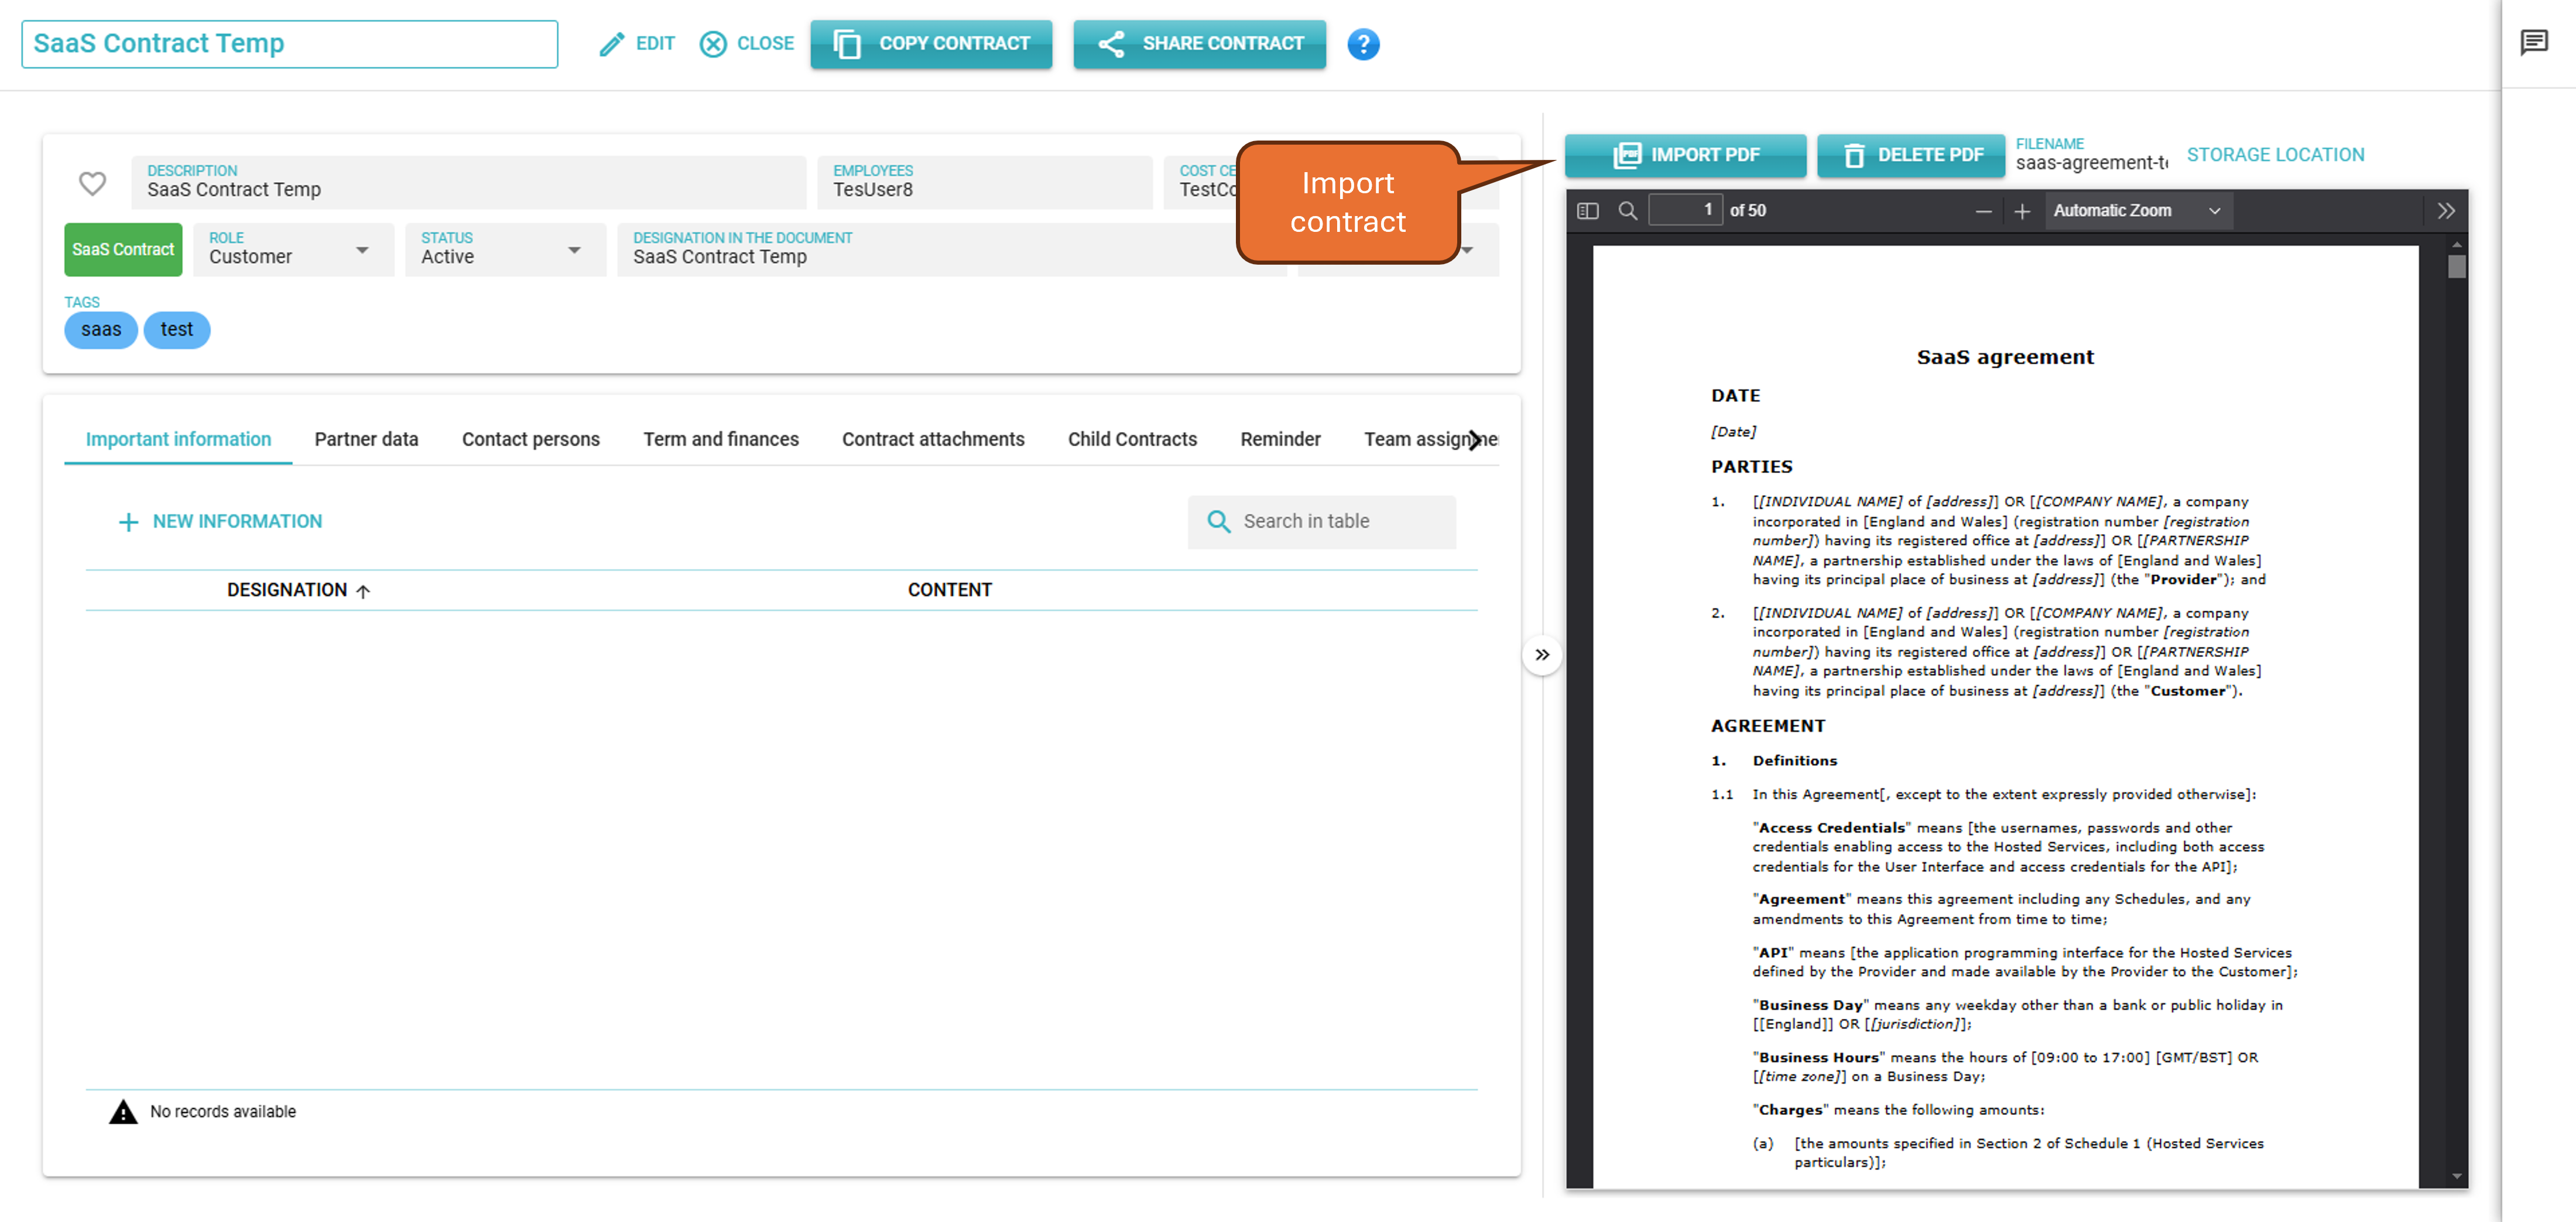
Once you have entered all the details, click on "ADD CONTRACT" The pop-up window will be closed, and the Detail View of the new contract will be displayed.
To upload the contract document, click on the “IMPORT PDF” button and select the document. The document will then be uploaded and displayed in the right section of the view.